Designing a Better Socket Rail: Stepped Rows, Grip Inserts and the Crown Button
· Robert Holl
Updated 28 September 2026: the design has moved on since this article first went up, so it now describes the rail as it is today.
Why another socket rail?
Every socket rail I have owned has been the same thing.
A strip of plastic with a row of clips. The sockets rattle, the clips wear out, and the first time you pick the rail up by one end, half the set ends up under the car.
The expensive ones are the same strip with a better logo on it. Everything looks the same because everything is made the same way.
Crown Forge tools are built to earn their place in your box. The thing that holds the sockets should earn its place too. I couldn't find one that did, so for the last few months I have been designing it.
What it had to do
- Hold every socket, even with the rail on its side.
- Let you reach the back row without knocking the front row.
- Give every socket a defined place, so it is obvious what is missing.
- Take a different socket set without starting again.
- Come apart for cleaning, because anything magnetic in a socket set collects every bit of grit in the workshop.
- Stay put in a steel toolbox, drawer or trolley.
- Never scratch the toolbox, the bench or the car.
- If one part gets damaged, replace that part, not the whole rail.
Two rows, two heights
The first decision shaped everything else.
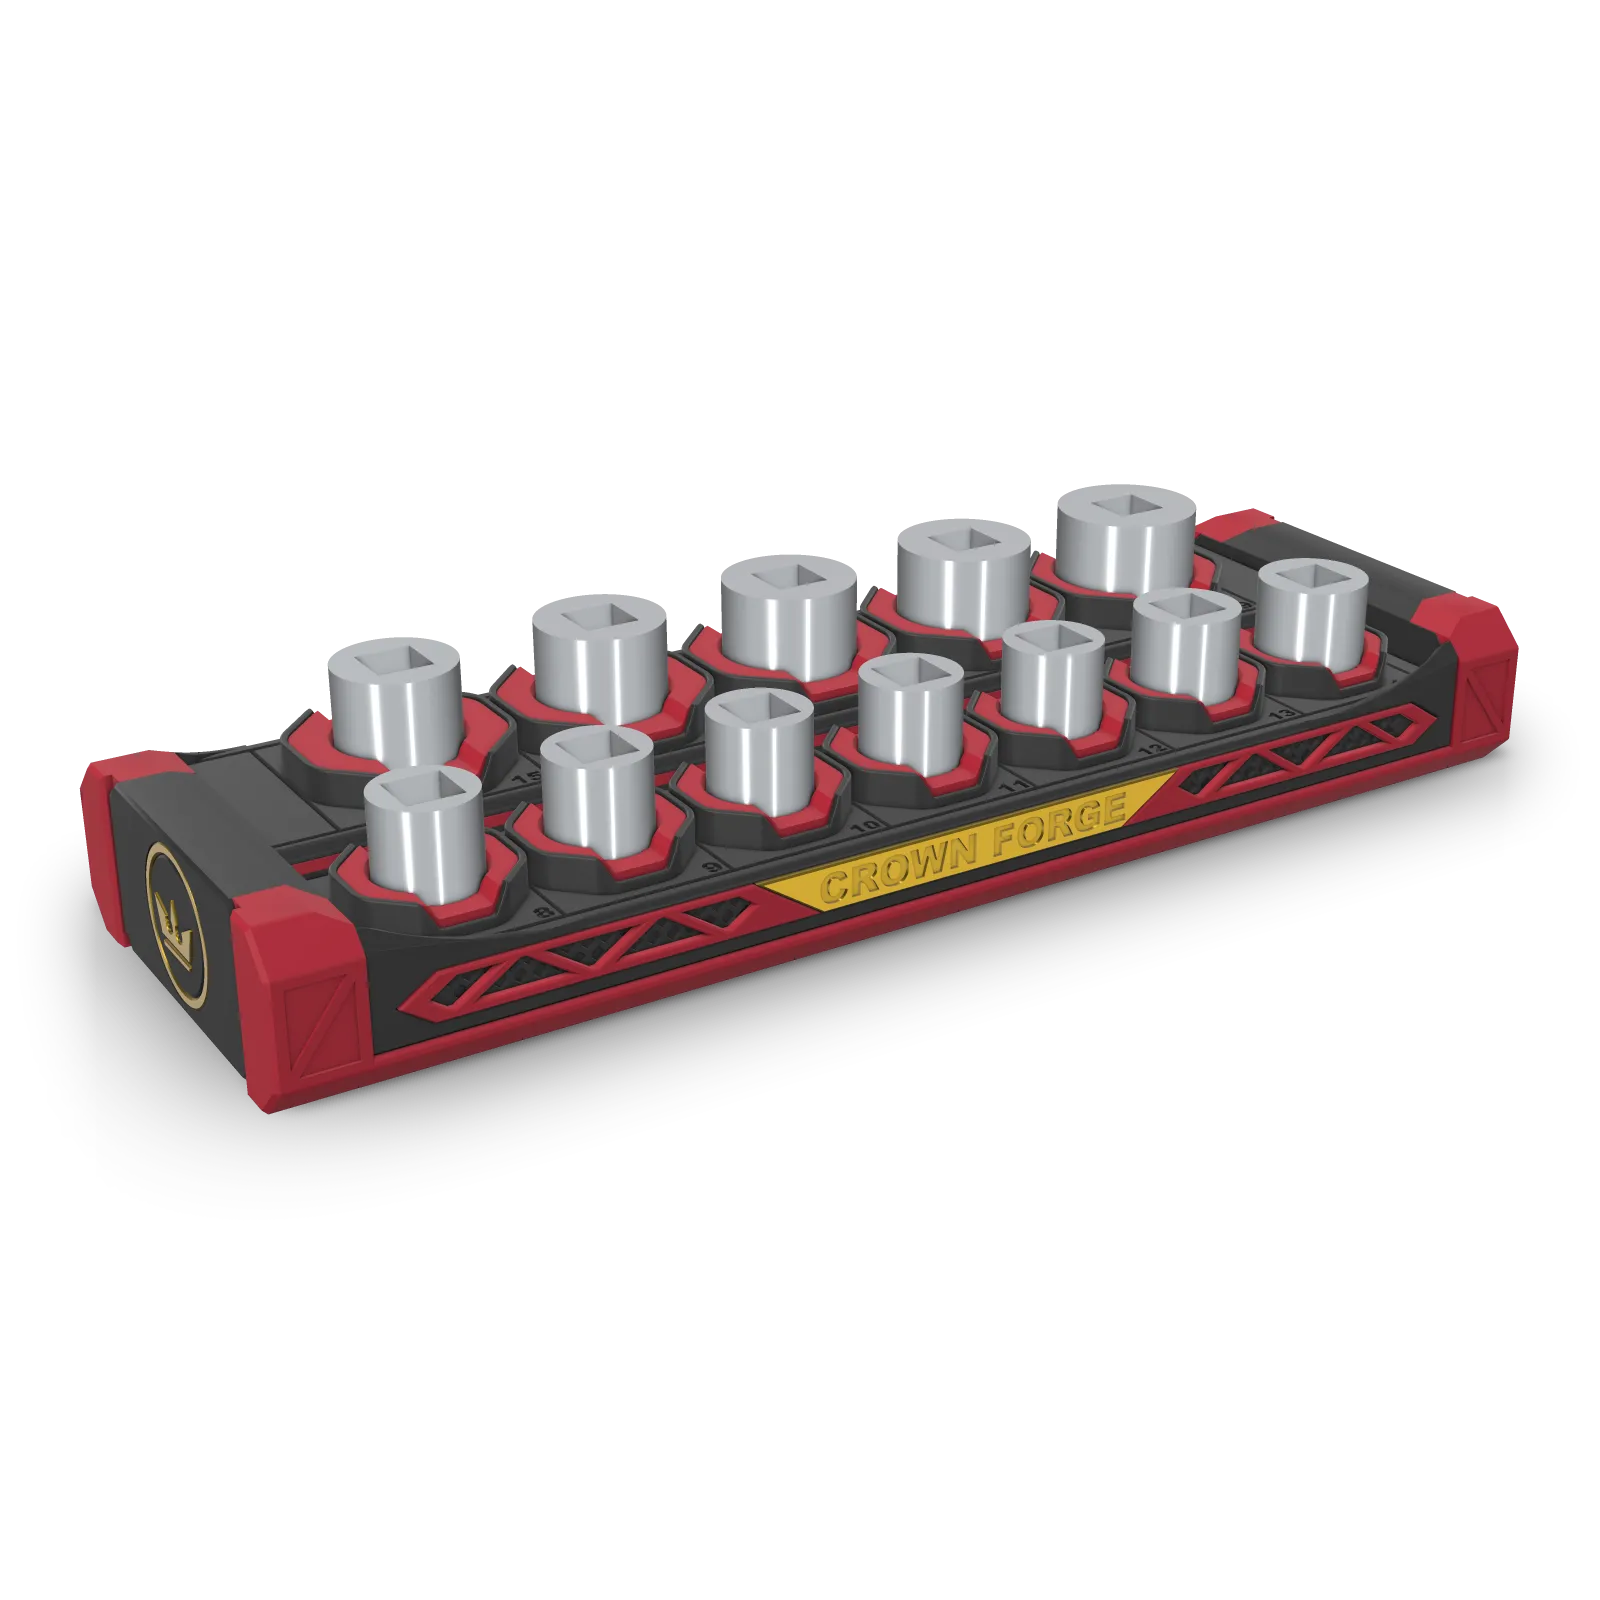
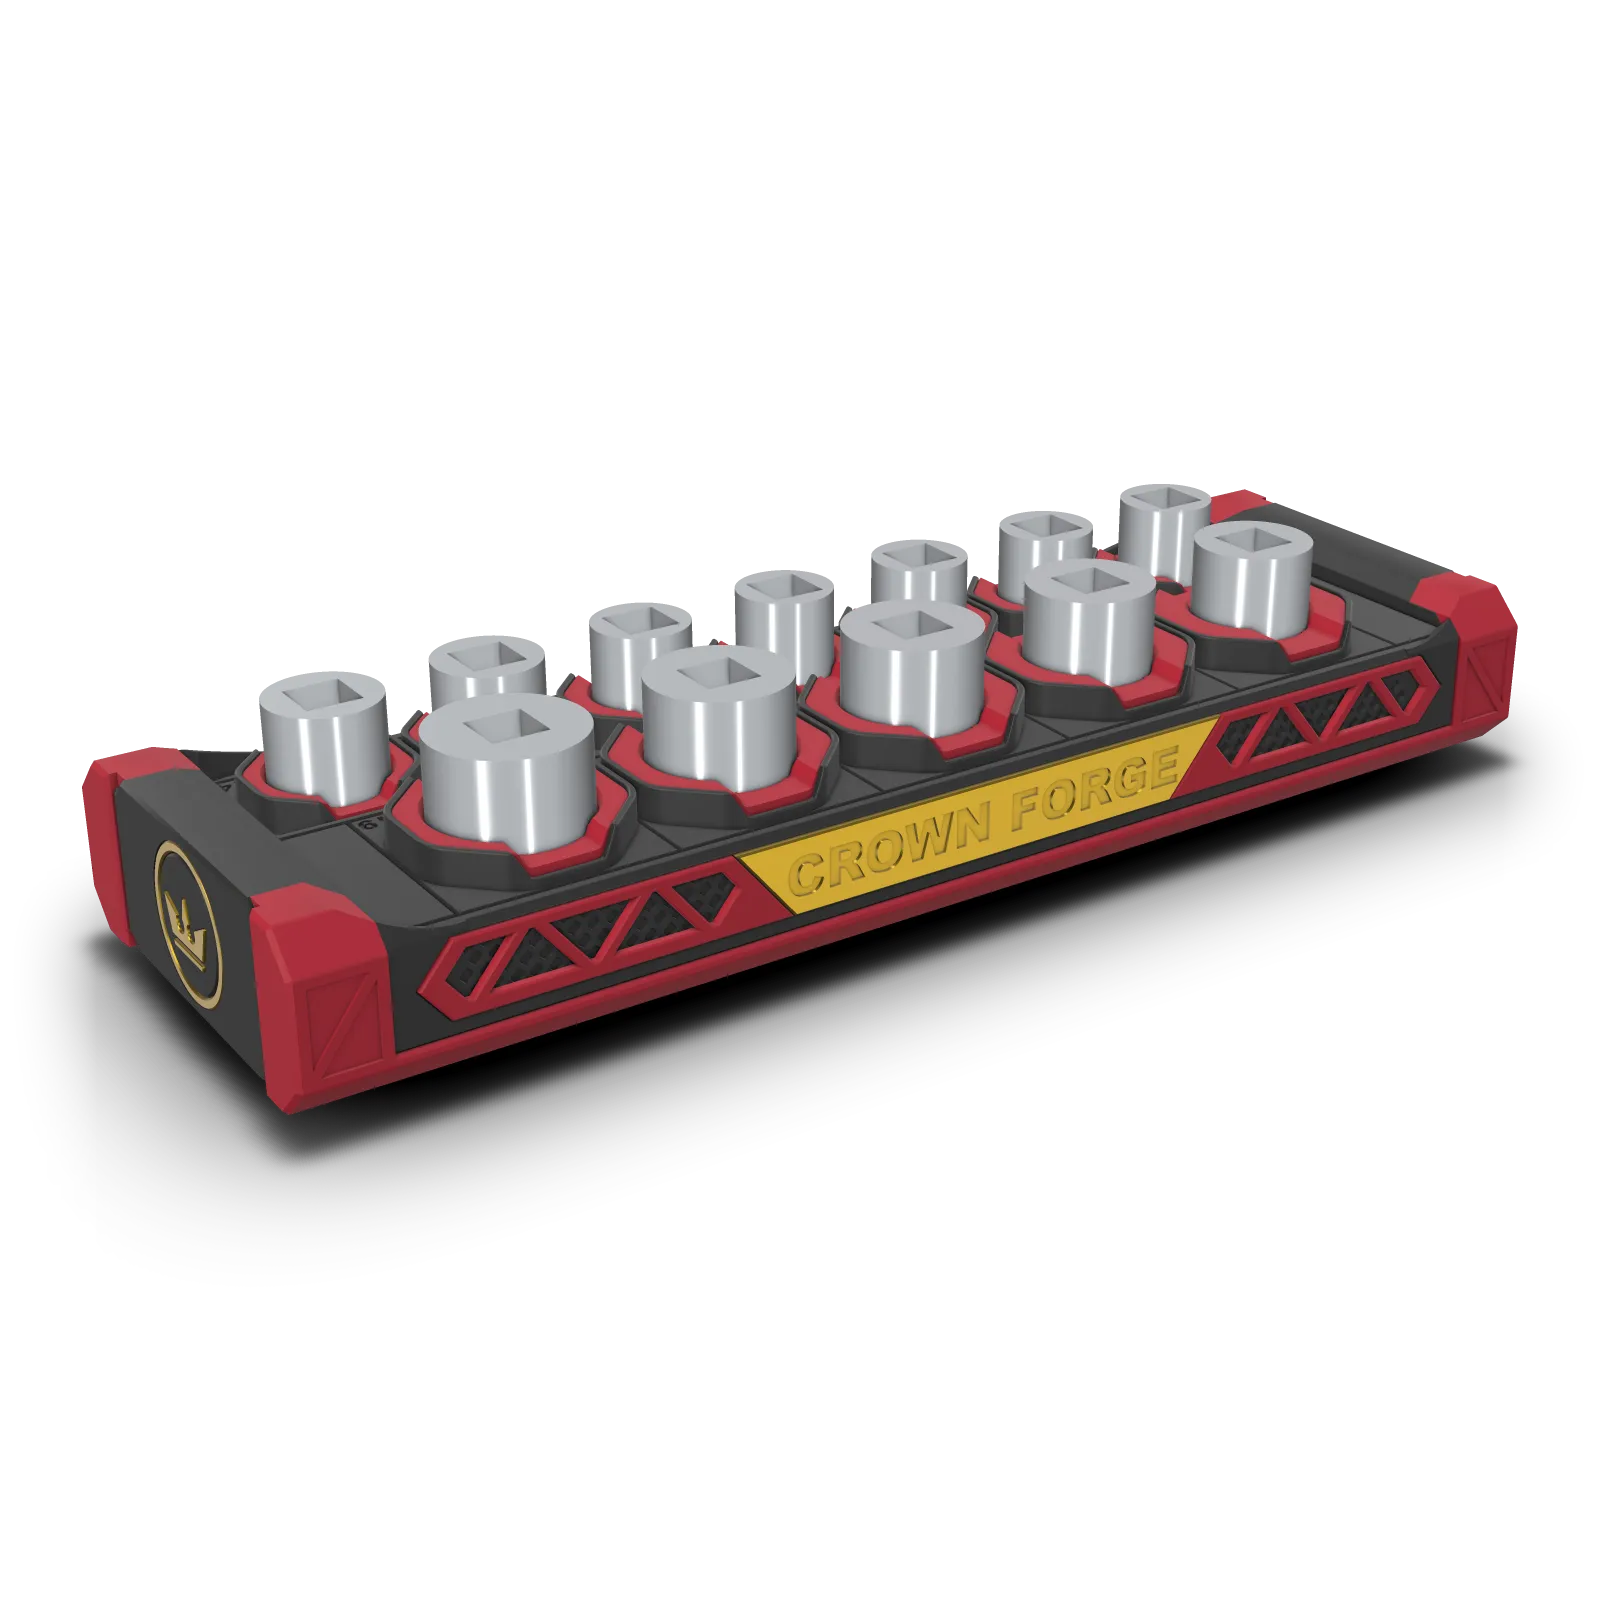
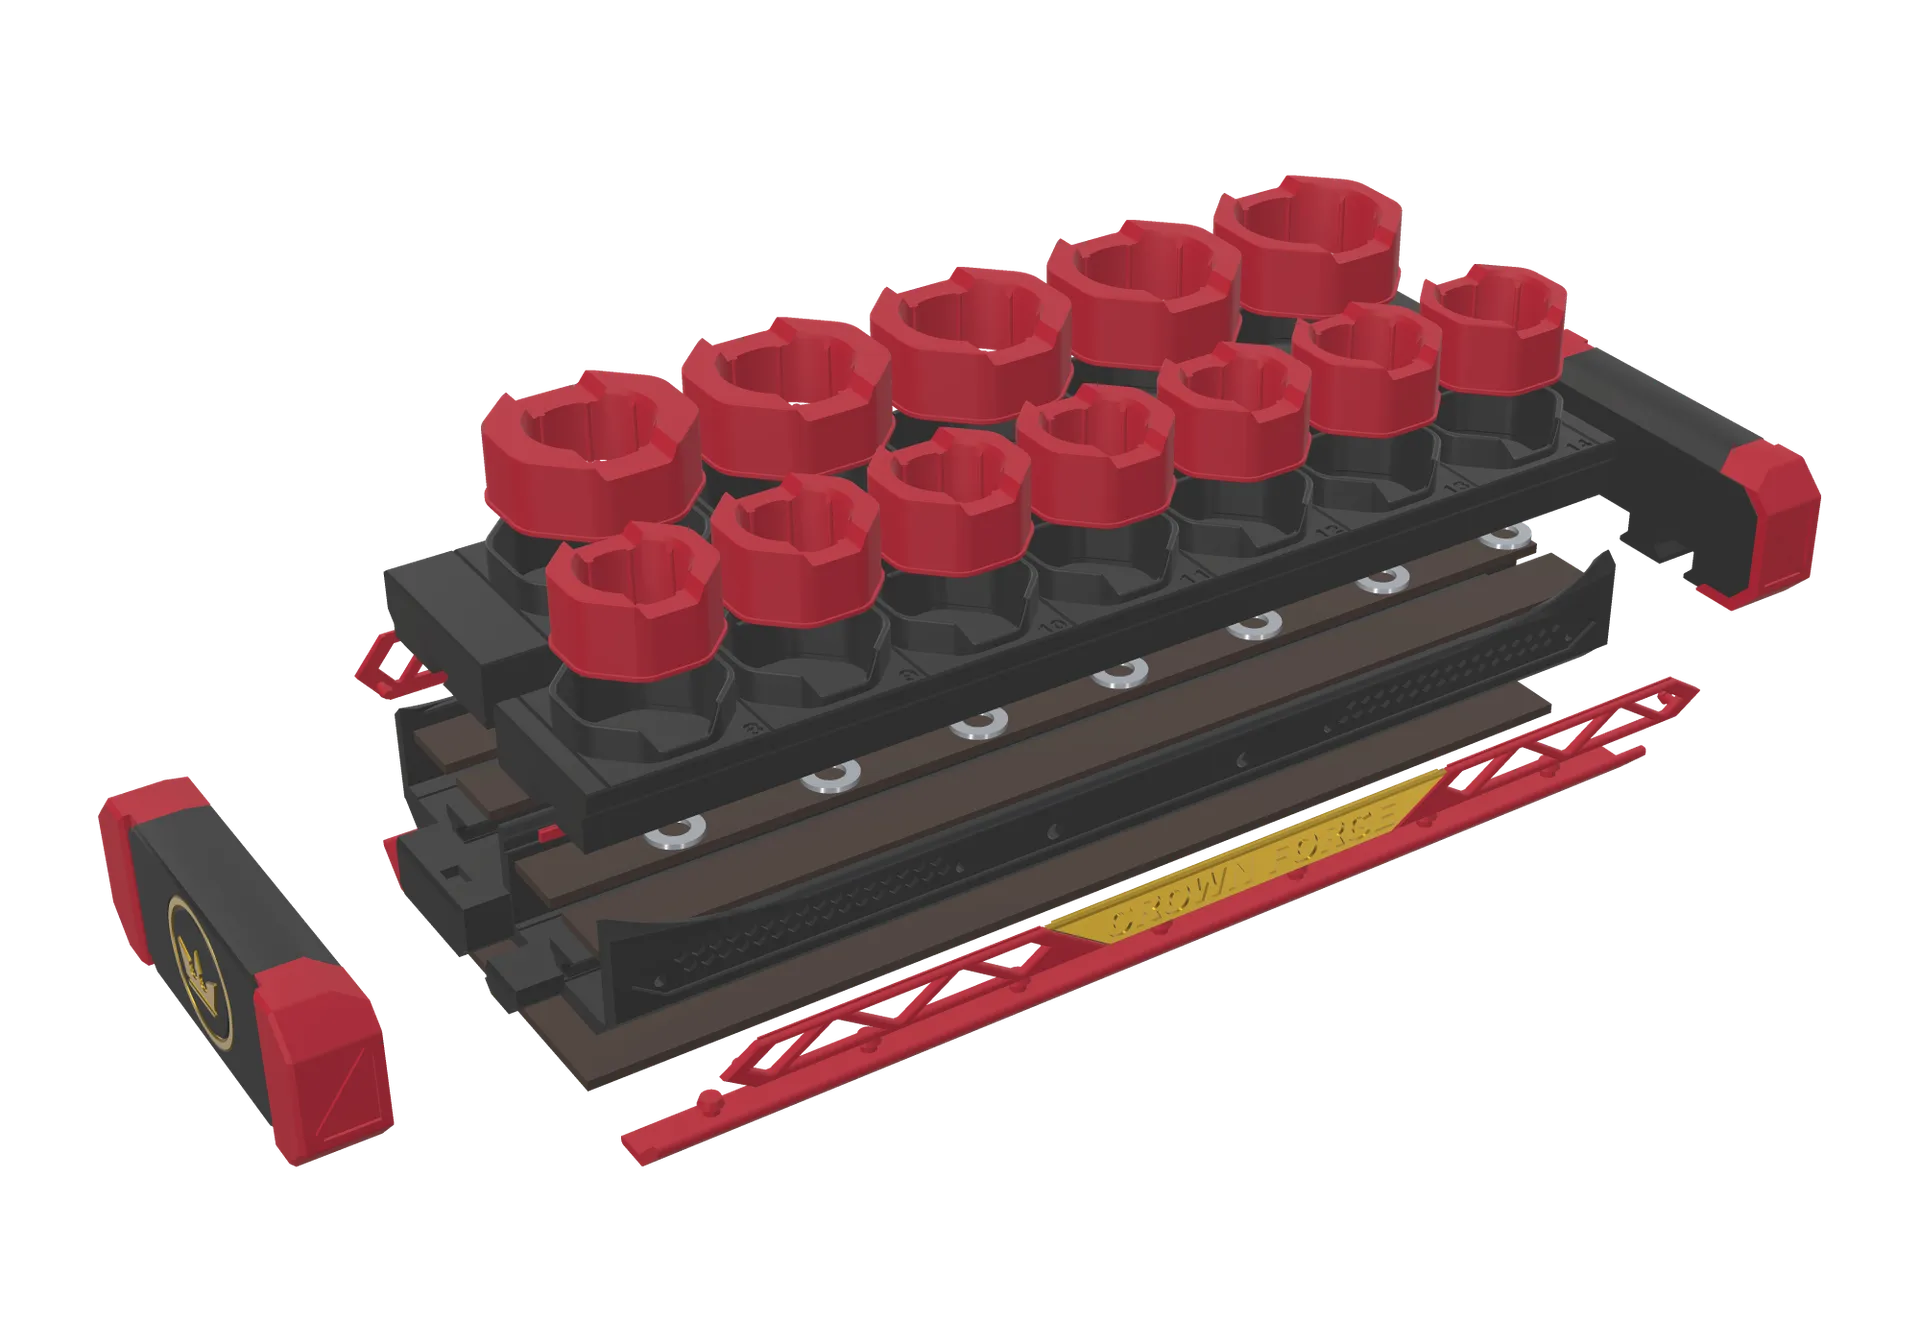
The back row sits 5 mm higher than the front row. The back sockets stand proud of the front ones, so you can pick them out without reaching over.
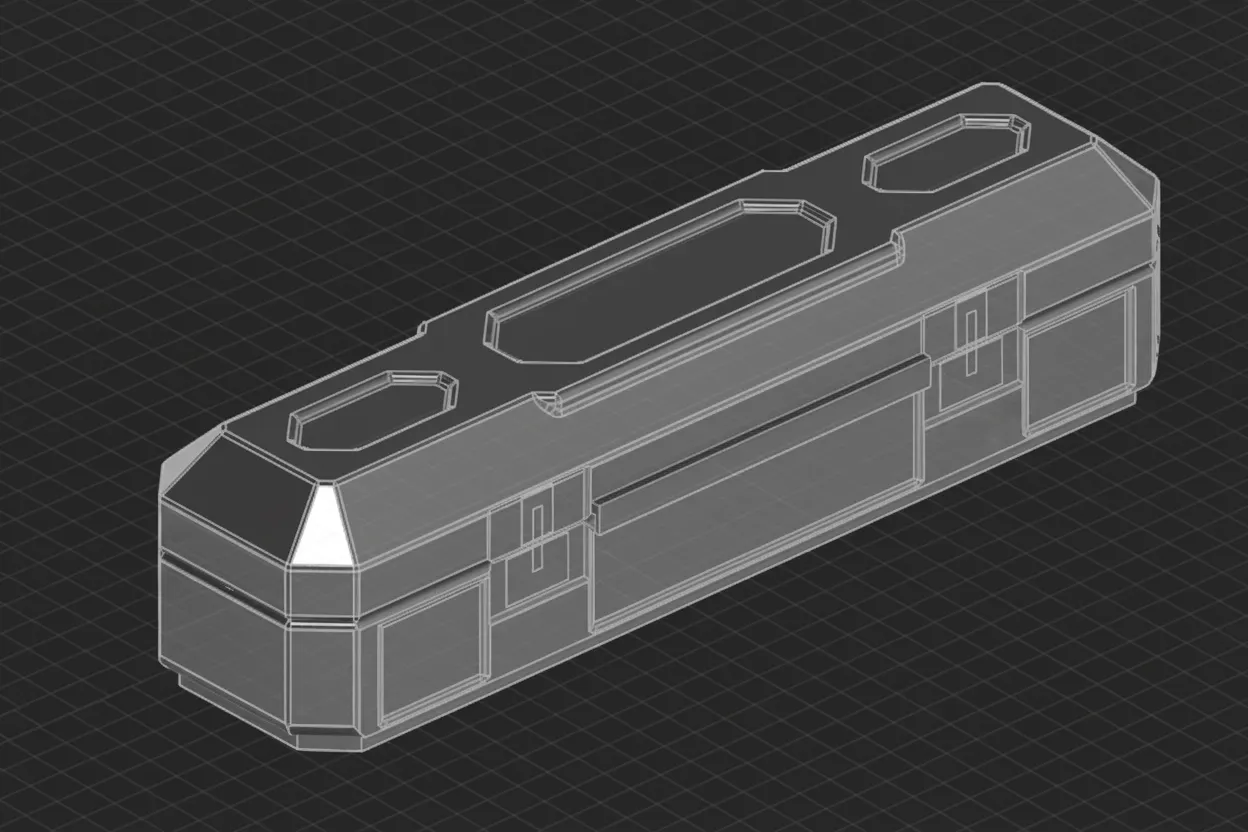
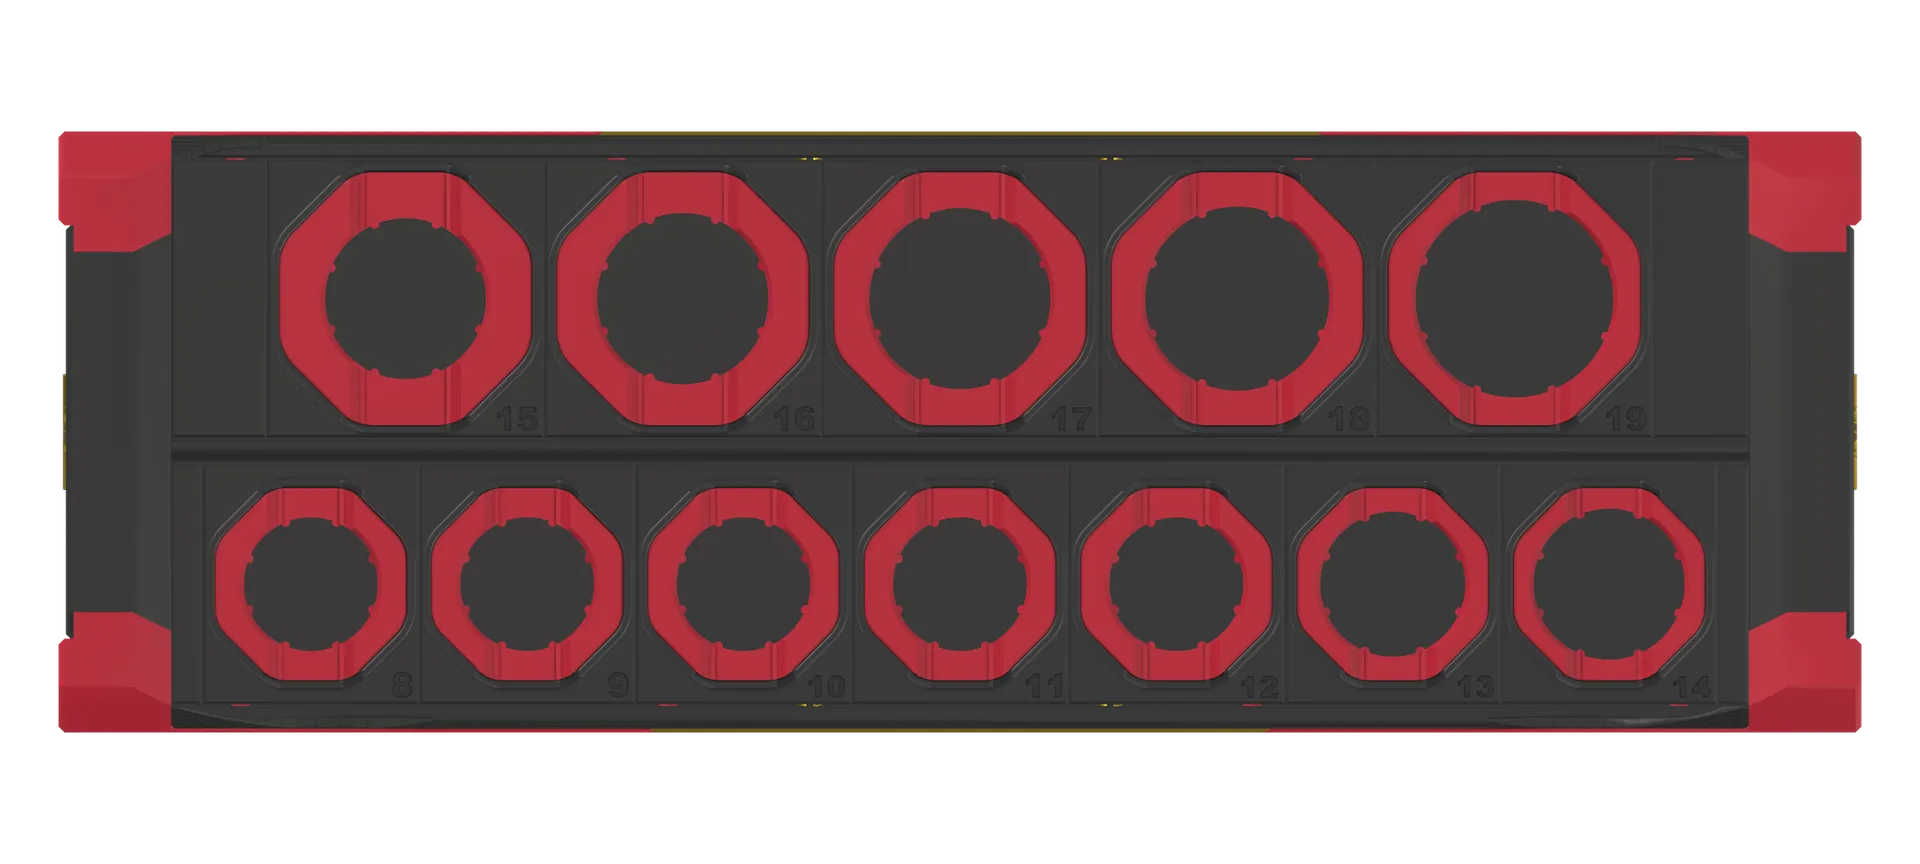
The rail is 80 mm wide and 30 mm tall. At 240 mm long it holds twelve 3/8" sockets: seven in the front row, up to 21.8 mm across, and five in the back, up to 29.9 mm.
A holder for every socket
Clips are the weak point of every rail I have used, so there aren't any.
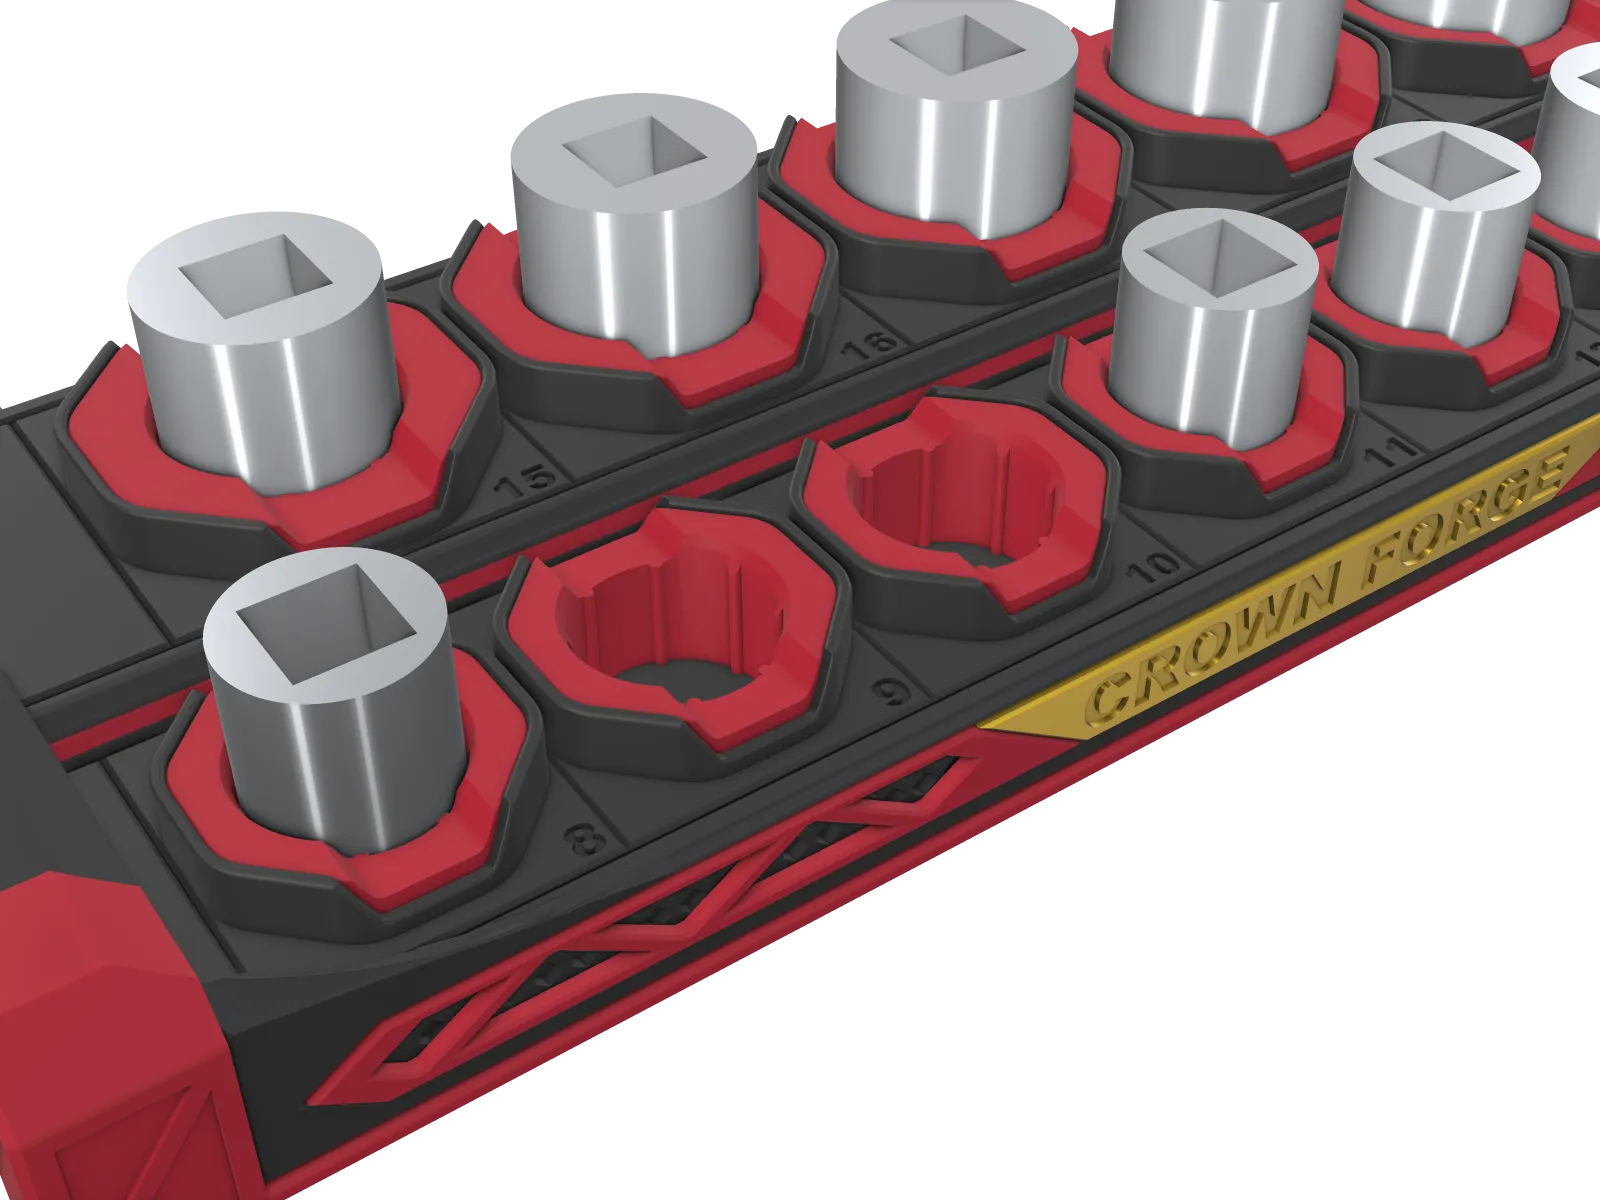
Each socket sits in its own black PETG holder, in a red TPU insert made for that socket. Inside the insert, eight small ribs do the gripping: the bore is 0.3 mm clear of the socket all round and the ribs reach 0.3 mm into that gap, so the socket is held firmly without jamming. The exact grip is being tuned on test prints.
The sockets sit down in the holders, held by their sides as well as their base, which matters when the rail is on its side in a trolley or on a wall. A lip at the bottom of each insert clicks into a groove in the holder, so pulling a socket out doesn't pull the insert with it. Every holder has its socket size engraved in the corner of the deck, so a gap tells you exactly what's missing.
Holders on rails
Every holder is a separate part that slides onto a dovetail rail running along its row. The dovetail is loose on purpose, so the holders slide on easily from the end of the rail, but they can't lift out.
Two steel washers are set into the base of every holder, and a strip of ferrite magnet runs either side of each rail, so every holder is pulled down and nothing rattles.
That is what makes the rail modular. The holders in a row are all the same size and only the insert changes with the socket: there is a range of inserts from 15 to 29.9 mm in 0.5 mm steps. Change your set and you swap an insert or slide a holder off and on. You don't need a new rail.
The crown button end caps
The end caps were the hardest part to get right. They have to come off easily, stay on through everyday knocks, and look good doing it.
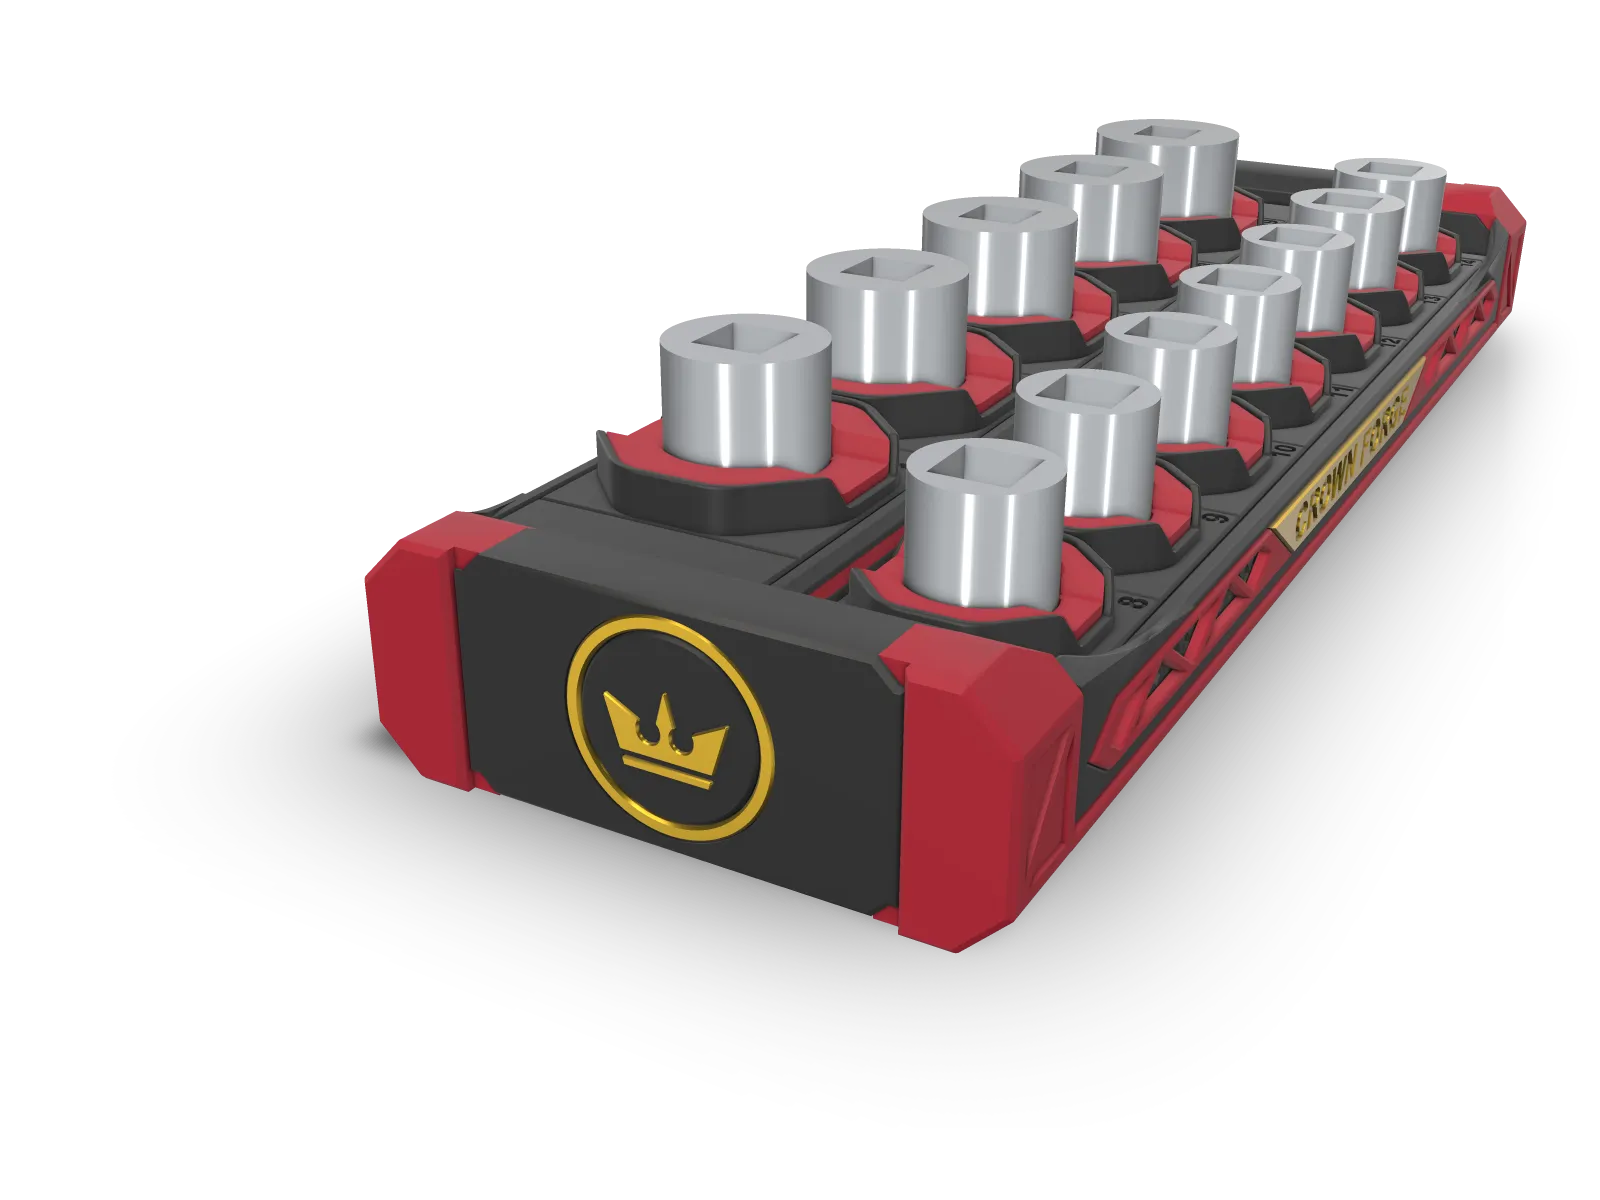
Each end of the rail has two solid dovetail tongues, and the cap slides onto them. A small bolt inside the cap drops into a notch in the back tongue and locks it in place. Press the crown and a 45 degree ramp on the button lifts the bolt, and the cap slides off. Two pairs of small magnets push the bolt and the button back again, so there is no spring to wear out, and sliding the cap back on clicks it home by itself.
Everything in the latch is rigid PETG, so nothing has to bend to work. The rail isn't meant to be carried by its ends, but if someone does pick it up that way the latch won't let go: by my sums it takes around 20 kg, and a full rail weighs about a kilo.
Every corner of the cap has a red TPU bumper, and the crown sits in a gold ring.
The face
The front and back carry red TPU lattice panels over a honeycomb texture, with a gold CROWN FORGE logo plate in the middle.
The lattice is a regular truss. It starts at the logo and works outwards, and the last triangles at each end are simply cut off by the frame, so it looks right on any length of rail. The panels are held on by pegs through the face.
Underneath
The base is completely flat and covered by a 2 mm ferrite sheet, so the rail stays where you put it in a steel toolbox, drawer or trolley. Red TPU strips run along both bottom edges, held on by mushroom-shaped pegs, so nothing hard touches the paintwork.
Any length, any set
The rail comes in 60 mm steps: 240, 300, 360 mm and on, measured over the end caps.
The whole design is generated from a handful of numbers. The length is one. The socket set is another: it is just a list of socket sizes. Change either and the holders, the inserts, the end pieces and the face panels all rebuild to suit. The 240 mm rail takes twelve sockets, the 300 mm sixteen and the 360 mm nineteen. The 240 mm rail comes first: the longer bodies need printing in two parts, which is next on the list.
How it's made
The rail is printed in black PETG, with red TPU for everything soft and gold PETG for the crown details. A design like this is easy to draw and surprisingly hard to print well, and most of the work went into details you never see.
Designing out the problems
- Print without supports. Every part prints with supports switched off. Where a roof would have needed support, it is a bridge the printer can span or a 45 degree slope instead. Supports have to be picked out by hand and leave marks, so designing them out saves time and gives a cleaner finish.
- Split it where it prints best. The body, the end caps, the holders, the latch and the crown details are all separate parts, each printed the way round that suits it.
- Size every detail to the nozzle. The size numbers are in a heavy typeface, so every stroke is wider than a single line of plastic.
- Check every edge a hand can reach. I went over the model edge by edge and rounded or chamfered everything you can touch. The few edges left crisp are the ones where parts fit together.
The numbers
The whole 240 mm rail prints on four build plates, all with supports off:
| Plate | Material | Weight | Print time |
|---|---|---|---|
| Body, end caps, end pieces and latch | Black PETG | 115 g | 3.9 hours |
| Twelve socket holders | Black PETG | 69 g | 2.6 hours |
| Logo plates, crown badges and rings | Gold PETG | 3.5 g | 12 minutes |
| Grip inserts, bumpers, lattices and edge strips | Red TPU | 68 g | 5.5 hours |
And the fits that took the longest to get right:
| Fit | Clearance |
|---|---|
| Socket in its grip insert | 0.3 mm all round, with eight ribs gripping 0.3 mm |
| Holder on its rail | 0.35 mm all round, loose on purpose |
| End cap on its tongues | 0.25 mm all round, so the cap doesn't wobble |
What's next
Testing. How firmly the inserts hold with the rail on its side, how the holders slide after a few hundred times on and off, how the crown button feels after a few hundred presses, and how hard the rail holds onto a toolbox. After that, the longer rails.
The goal
A socket rail that holds every socket, shows you what is missing, takes whatever set you own and belongs in a Crown Forge box.
Coming soon
The Crown Forge Pro socket rail is coming soon. Want to know when it's ready? Leave your email on the Pro rail page, and follow The Workshop for the test results.